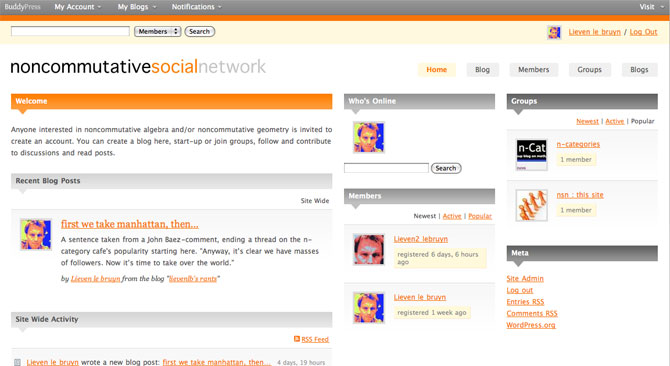
Last time I wondered whether a set-up like WordPress.com meets FaceBook with add-ons (such as wiki- and latex-support) might be a usable environment for people working in a specific arXiv-topic.
I’ve used WordPressMU and BuddyPress to create such an embryonal environment. At first I thought I’d extend it a bit before going online but I fail to have the energy right now so I might as well make the link available. If you are into math.QA and/or math.RA you are invited to join the experiment. But, please use this site gently as I’ll have to drop it otherwise.
I’ve no desire to maintain this site indefinitely but would welcome others to set up something similar. For this reason I’ll write a couple of posts explaining how you can build it yourself when you’d have a free afternoon and a spare Mac around. Each post should not take you longer than 1 hour. Today, we’ll provide the boring but essential basics : we must get a MySQL-server and a WebServer running. Next time, I’ll take you through the WordPressMU (MU for multi-users) and BuddyPress installation. After that, we’ll add extra functionality.
We will start from a vanilla 10.5.6 installation. We will often need to edit files, so we’d better grab a good, free texteditor : TextWrangler, drag it to Applications and place it in the Dock. We’ll also type in commands so we want the TerminalApp (to be found in Applcations/Utilities) in the Dock. SystemPreferences and Safari are already in the Dock and as we will need these tools a lot we might rearrange the Dock to look like

From left to right : the Finder, Terminal, Safari, TextWrangler and System Preferences. From now on we will mean by ‘Open …’ that you click on the ‘…’ icon. In the end we want our computer to become a web-server, so we don’t want it to go to sleep. Open SystemPreferences and look for the ‘Energy Saver’-icon, click on the ‘Show details’ button and set the ‘Put the computer to sleep when it is inactive for:’ to Never and unmark the ‘Put the hard disk(s) to sleep when possible’ at the bottom.
We will need to start or stop the WebServer so here’s how that’s done : open SystemPreferences and look for the ‘Sharing’-icon. Marking the ‘Web Sharing’ option is equivalent to starting your webserver (you can verify this by opening Safari and pointing it to http://localhost/ and you should see the default Apache-screen), unmarking it stops the webserver (check this by repeating the previous, now you should get a ‘Safari can’t connect to the server’ message).
All of this was probably trivial to you so let’s do something a bit more advanced : setting up a database-server. OSX doesn’t come with MySql, so we need to download and install it.
MySQL :
Get the latest version : choose the Mac OS X 10.5 (x86)-package and download it (they ask you to register but you can bypass this by clicking on the ‘No thanks, just take me to the downloads’-link). It is a 55.3 Mb file so this may take a couple of minutes. If all goes well this window should pop-up
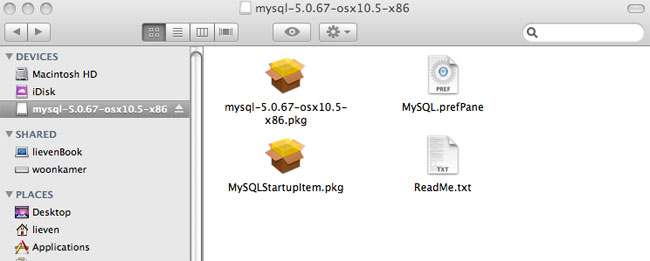
Click on the mysql-5.0.67-osx10.5-x86.pkg icon and follow the instruction (defaults suffice, you’ll be asked to give your sudo password and in all it will take less than a minute). Repeat this procedure with MySQLStartupItem.pkg. Done!
To verify it, Open Terminal and type this to the prompt
sudo /Library/StartupItems/MySQLCOM/MySQLCOM start
You’ll get a scary warning message but type in your sudo-password and the Mysql-server will start. You can access it by typing
/usr/local/mysql/bin/mysql
and type exit to the mysql-prompt to leave.
In all, your interaction with the terminal should look something like this
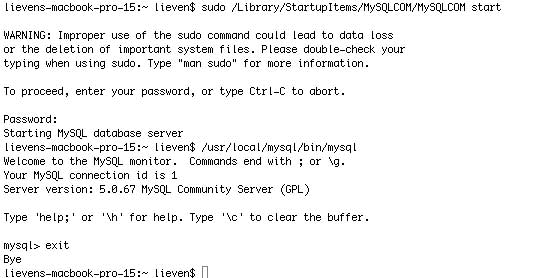
Clearly, you do not want to type all of this every time, so we will add the mysql-location to our ‘PATH’. To do this, open TextWrangler and add this line to the blank document
export PATH=$PATH:/usr/local/mysql/bin
and save the file as .profile in your home-directory (the one with the ‘House’-icon, usually given your name). You will get a warning that .-files are reserved but go ahead anyway by clicking the use . – button). Now, open Terminal and type this
source ~./profile
echo $PATH
if all went well you should now see the mysql-location at the end of your path. From now on you’ll only have to type
mysql
to the terminal-prompt to open MySql. At the moment the root-user of your mysql has no password which isnt safe so we’d better set one. Open terminal and type
mysqladmin -u root password NEWPASSWORD
where, of course, you replace NEWPASSWORD with your choice (use only letters and numbers). From now on you can access your mysql-server by opening Terminal and typing
mysql -u root -p
and giving your password. Okay, so we’ve established our first goal, we have a working Mysql. Take a break if you need one.
better PHP
Mac 10.5 comes equipped with php5 but unfortunately it isn’t quite up to what we need. So, we need to install a better one and tell the mysql-server and the webserver to use the new one instead of the standard one.
Open Safari and grab the better php-version by going to
http://www2.entropy.ch/download/php5-5.2.5-6-beta.tar.gz
It is a 85.2 Mb file, so have a bit of patience. The file gets unzipped automatically and downloaded in the Downloads-directory. Open Finder and go there. At the moment your Downloads-directory will look like
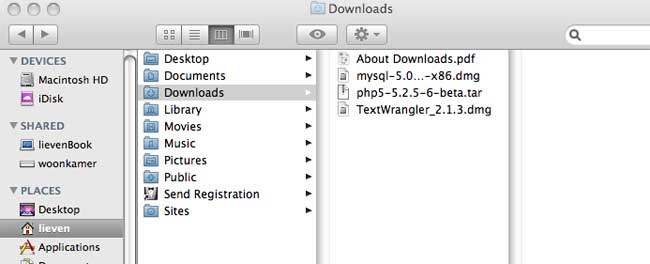
Doubleclick on the php5-5.2.5-6-beta.tar file and a new directory will be created called php5. We will now move this directory and lay some symbolic links. Open a new Terminal window and type the following commands (and provide your sudo-password when asked)
cd Downloads
sudo mv php5 /usr/local
sudo ln -sf /usr/local/php5/entropy-php.conf /etc/apache2/other/+entropy-php.conf
sudo mkdir /var/mysql
sudo ln -s /tmp/mysql.sock /var/mysql/mysql.sock
Next, we have to tell the webserver to use this new php-version instead of the old one. This information is contained in the apache-configuration file : httpd.conf. Open TextWrangler and under ‘File’ choose the option ‘Open File by Name’. Type /etc/apache2/httpd.conf in the field that appears. The file will now appear in the main window. Under ‘Search’ choose the ‘Go to Line’ option and fill in 114 and hit the Go To button. The follwing line should now be highlighted
#LoadModule php5_module libexec/apache2/libphp5.so
immediately under it add the following line (TextWrangler will tell you that the file is owned by root and ask you whether you want to open it, click yes and make the changes)
LoadModule php5_module local/php5/libphp5.so
(observe that line 114 is commented out, that is, starts with a #, whereas your added line is not).
Save the file (Textwrangler will ask you to provide the sudo-password).
Next, we will have to tell php to communicate with the mysql-server. Again, open TextWrangler, under ‘File’ choose ‘Open File by Name’ and type in /usr/local/php5/lib/php.ini-recommended. When the file appears, under ‘Search’ choose ‘Go to Line’ and type in 810. It will read
mysql.default_socket =
Change it as follows (that is, add to it)
mysql.default_socket = /var/mysql/mysql.sock
and now choose under ‘File’ the ‘Save as…’ option. In the window change php.ini-recommended to php.ini and click Save. Done!
Testing…
Restart your webserver. Recall that this means: open SystemPreferences, choose ‘Sharing’, unmark ‘Web Server’, wait 5 seconds and then mark it again.
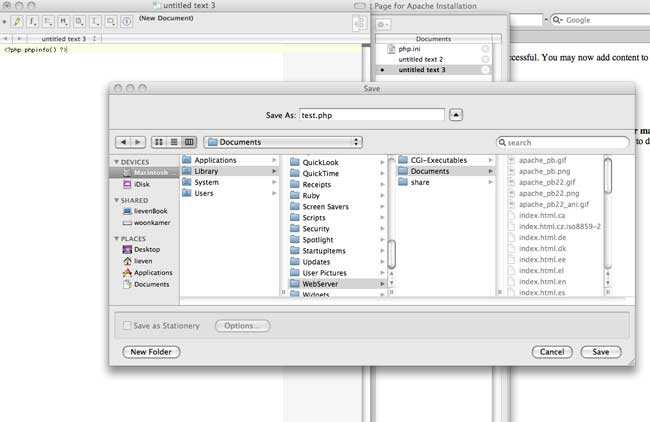
Open TextWranger, make a new Text document containing just one line (remove the white space between the ?-signs and the brackets) :
< ?php phpinfo() ? >
Choose ‘File’ and ‘Save as…’ and in the window that appears navigate to YourHardDisk/Library/WebServer/Documents, name the file ‘test.php’ and click the ‘Save’ button
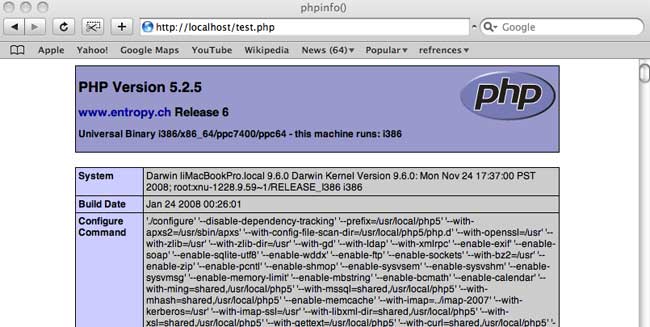
Finally, open Safari and point it to http://localhost/test.php. Cross your fingers and if you get a screen like the one below treat yourself to something nice!
 Both posts were influential to