Last time we took a clean mac os x 10.5.6 installation and upgraded it to a MySQL and Apache-PHP+ server. This hour we’ll turn it into a math2.0-test environment. That is, we will install WordPressMU (the ‘multiple user’ version of WordPress which can host 10 or 100 or thousands of blogs on your computer). Then, we’ll turn this potential into a FaceBook-like social network.
Probably it is best to test this just on your ‘localhost’ before going worldwide. Therefore, I’ll describe here the test-environment-version (the changes to make for going www I’ll describe later, but, they are minor). Here’s the first problem : WordPressMu doesn’t recognize ‘localhost’ as a valid domain, so we’ll have to use something like ‘localhost.localdomain’ and tell our server to recognize this new address.
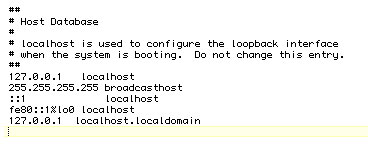
Open TextWrangler, under File/Open File by Name type /etc/hosts and add (again you’ll be asked to unlock the file as it is owned by ‘root’ and you’ll have to provide your sudo-password when you want to save it) to the end of that file (it’s short) the line
127.0.0.1 localhost.localdomain
Save it.Your file should now look like this
You can verify this by opening Safari and pointing it to http://localhost.localdomain. You should now see the default Apache-page (no need to restart the WebServer). Next, within TextWrangler do again a File/Open File by Name and type /etc/apache2/httpd.conf and under Search/Go to Line… say 211. The highlighted line reads
AllowOverride None
change it to (again the root and sudo routine as before)
AllowOverride All
and save it. Restart the WebServer (that is, open SystemPreferences go to Sharing, unmark and remark again after a tiny delay WebSharing). Okay, I think we are set
WordPress MU :
We need a database to store everything. If your database-root password set last time is myRootPassword then do the following (change to whatever it really is). Open Terminal and type to the prompt
mysql -u root -p
and provide MyRootPassword when asked. Now we have to tell MySQL to create a database, set a database-user and password (for safety reasons it better be a new user and password, but as this is merely a test-environment…). So, to the mysql-prompt we type the following string of commands
mysql> CREATE DATABASE mywordpressMU;
Query OK, 1 row affected (0.00 sec)
mysql> GRANT ALL PRIVILEGES ON mywordpressMU.* TO root@localhost IDENTIFIED BY “MyRootPassword”;
Query OK, 0 rows affected (0.00 sec)
mysql> FLUSH PRIVILEGES;
Query OK, 0 rows affected (0.01 sec)
mysql> SET PASSWORD FOR root@localhost = OLD_PASSWORD(“MyRootPassword”);
Query OK, 0 rows affected (0.01 sec)
mysql> EXIT
Bye
The OLD_PASSWORD-command seems odd, but is needed as WordPress doesn’t like the password-structure of MySQL 5. If you forget this, you’ll get database-errors.
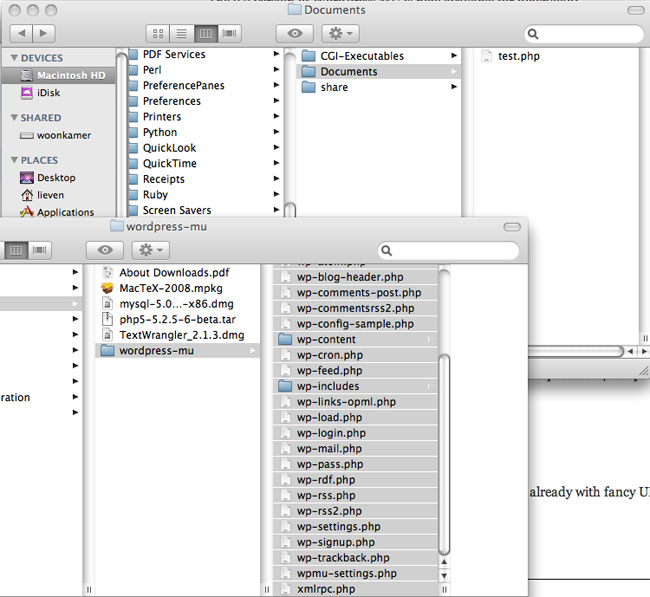
Open Safari and download the latest WordPressMU here. Open two Finder windows, one pointing to YourHome/Downloads (in which a new folder “wordpress-mu” is created and another one pointing to “Macintosh HD/Library/WebServer/Documents. You may as well drop the content of this Documents-directory into the Trash (the file test.php we created last time excluded).
Select everything in the first-window wordpress-mu directory and drag all of it to the second-window Documents directory.
Open Terminal and type these to the prompt
$ cd /Library/WebServer
$ sudo chmod 777 Documents
Password: (fill in your sudo password)
$ cd Documents
$ sudo chmod 777 wp-content
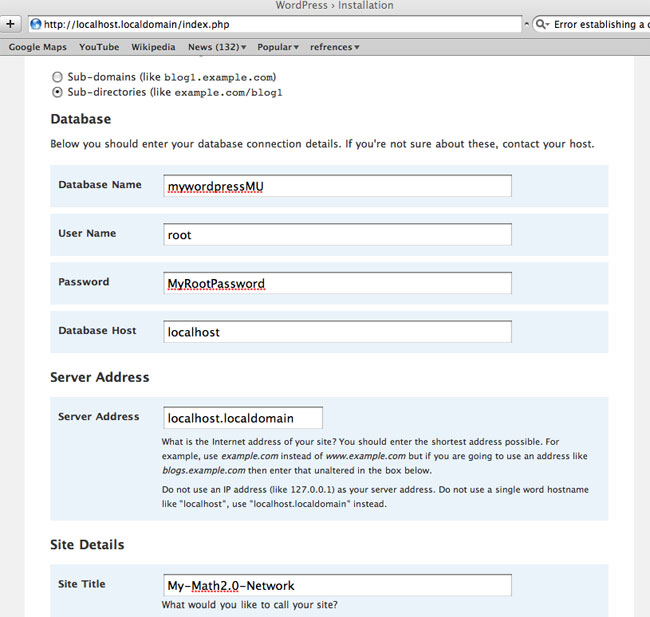
Point your Safari to http://localhost.localdomain/index.php and you should get a WordPress mu install page. Make sure to choose the Sub-directories option (instead of the default sub-Domain option) and fill out the required info
You should get a success-page giving you the first password to login as admin. (In case you get a database-error, remove the wp-config.php file, redo the OLD_PASSWORD command given above and repeat the install. Everything should work!). Do this, go to the Users-tab and edit your admin-account to change the password (at the bottom) to something you can remember easily.
Remember to change the directory permissions again to 755. That is, open Terminal and do
$ cd /Library/WebServer
$ sudo chmod 755 Documents
Password: (fill in your sudo password)
$ cd Documents
$ sudo chmod 755 wp-content
We now have a working WordPressMU, you can create new users and they can start new blogs, but there isn’t yet any interaction between these users and your site looks, well…
Let’s spice it up a bit with
BuddyPress :
“BuddyPress is a set of WordPress MU specific plugins, each plugin adding a distinct new feature. BuddyPress contains all the features you’d expect from WordPress but aims to let members socially interact.”
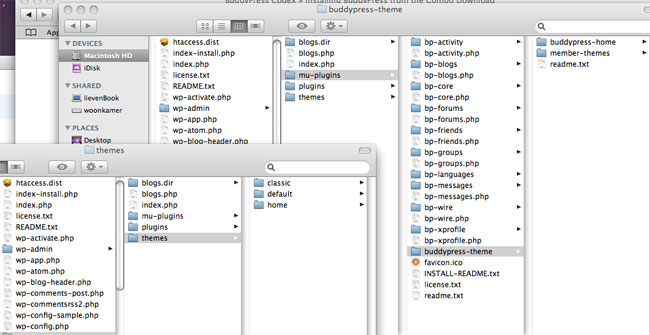
We start by getting the BuddyPress Combo Download (say the .zip file) which will create a buddypress-combo directory in YourHome/Downloads. Open this directory and as before drag its entire content to /Library/WebServer/Documents/wp-content/mu-plugins.
In the buddypress-theme directory there are two subdirectories which need to be put elsewhere. The subdirectory buddypress-home must be dragged to the wp-content/themes directory (containing at the moment only the classic, default and home theme) and the subdirectory member-themes must be dragged to the wp-content directory
Log in again as admin in your WpMU via http://localhost.localdomain/wp-admin/ under Site Admin/Themes activate the BuddyPress Home Theme and press the ‘Update Themes’ button.
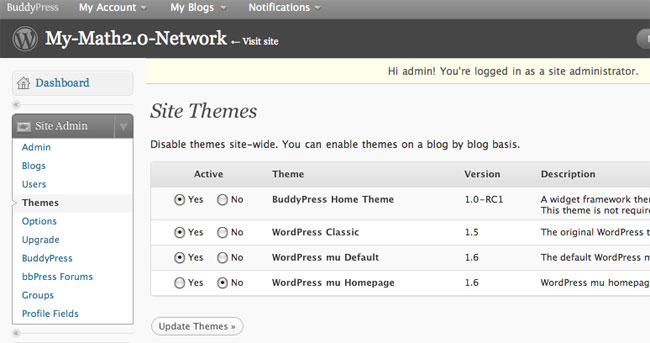
Similarly, in Site Admin/Options mark under ‘Allow new registrations’ the option ‘Enables. Blogs and user accounts can be created’ and update these options via the button at the bottom. Finally, under Appearance click on the BuddyPress Home Theme and activate it (top right).
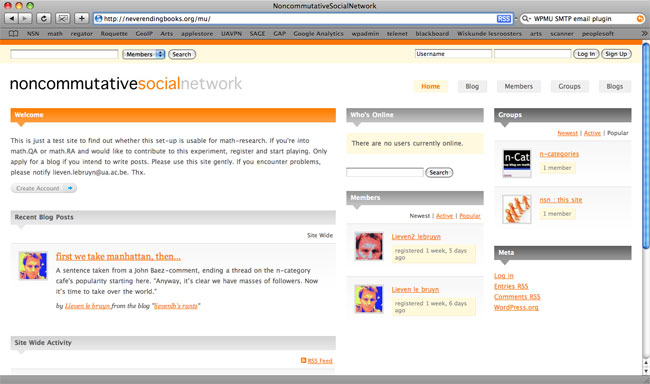
Now, visit your site and change it to your liking via adding widgets. For example, add ‘Welcome’, ‘Recent Blog Posts’ and ‘Site Wide Activity’ to the left column, ‘Who’s Online’ and ‘Members’ to the center column and ‘Groups’ and ‘Meta’ to the right column.
Next, create new users (via Site Admin/Users and not via signup as this is just an offline test-version and signup sends out activating emails…), create groups, blogs and posts, let users befriend one another and send wires, etc. etc. all the things people do in a web2.0 environment.
One further comment : if you want to have avatars uploaded you’ll have to open Terminal and type the following :
$ cd /Library/WebServer/Documents
$ sudo mkdir avatars
$ sudo chown _www:admin avatars
Finally, if your iMac is a proper web-server (that is, has its own URL) you can take your math2.0-network worldwide repeating the above procedure with obvious modifications (that is, replacing localhost.localdomain by the URL of your machine). In order to get the signup/email system going you may need to install the Swift-SMTP-Mailer plugin and feed it your outgoing mail-server (also you’ll have to enable plugins in the SiteAdmin/Options).
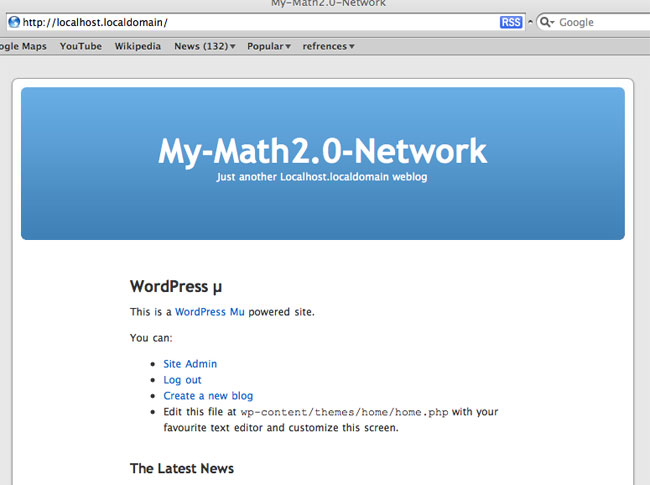
An embryonal version of your site may then look like this one
While this may already be good enough for the rest of the world, mathematicians talk LaTeX to each other, so we’d better include LaTeX-support (and perhaps also some Wiki-support). This we will do another time…
Comments