About a year ago I did a series of posts on games associated to the Mathieu sporadic group $M_{12} $, starting with a post on Conway’s puzzle M(13), and, continuing with a discussion of mathematical blackjack. The idea at the time was to write a book for a general audience, as discussed at the start of the M(13)-post, ending with a series of new challenging mathematical games. I asked : “What kind of puzzles should we promote for mathematical thinking to have a fighting chance to survive in the near future?”
Now, Scientific American has (no doubt independently) taken up this lead. Their July 2008 issue features the article Rubik’s Cube Inspired Puzzles Demonstrate Math’s “Simple Groups” written by Igor Kriz and Paul Siegel.
By far the nicest thing about this article is that it comes with three online games based on the sporadic simple groups, the Mathieu groups $M_{12} $, $M_{24} $ and the Conway group $.0 $.
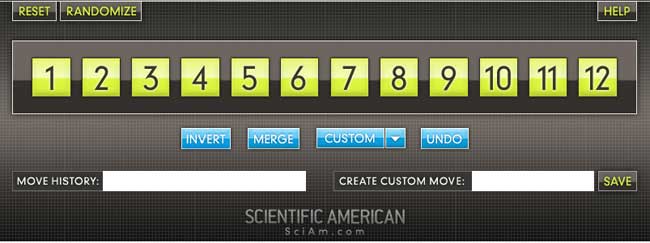
the M(12) game
Scrambles to an arbitrary permutation in $M_{12} $ and need to use the two generators $INVERT=(1,12)(2,11)(3,10)(4,9)(5,8)(6,7) $ and $MERGE=(2,12,7,4,11,6,10,8,9,5,3) $ to return to starting position.
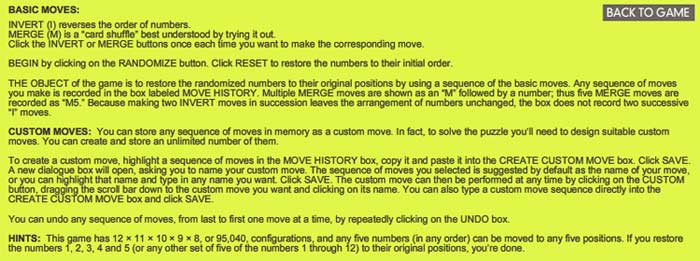
Here is the help-screen :
They promise the solution by july 27th, but a few-line GAP-program cracks the puzzle instantly.
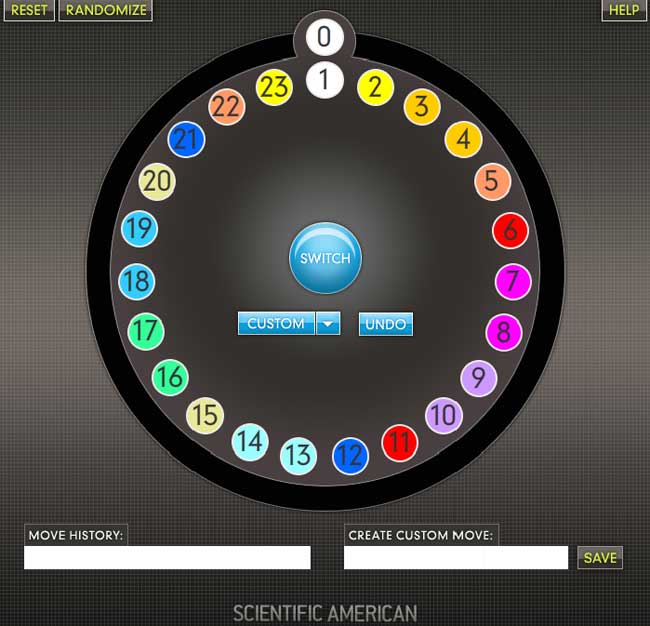
the M(24) game
Similar in nature, again using two generators of $M_{24} $. GAP-solution as before.
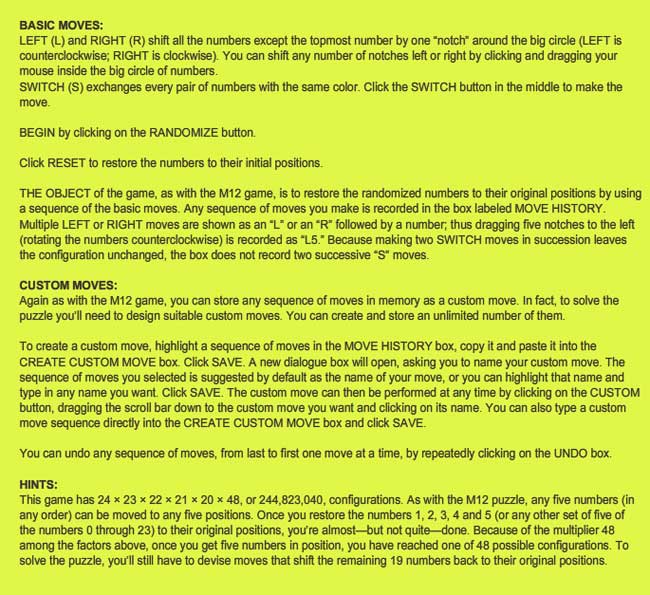
This time, they offer this help-screen :
the .0 game
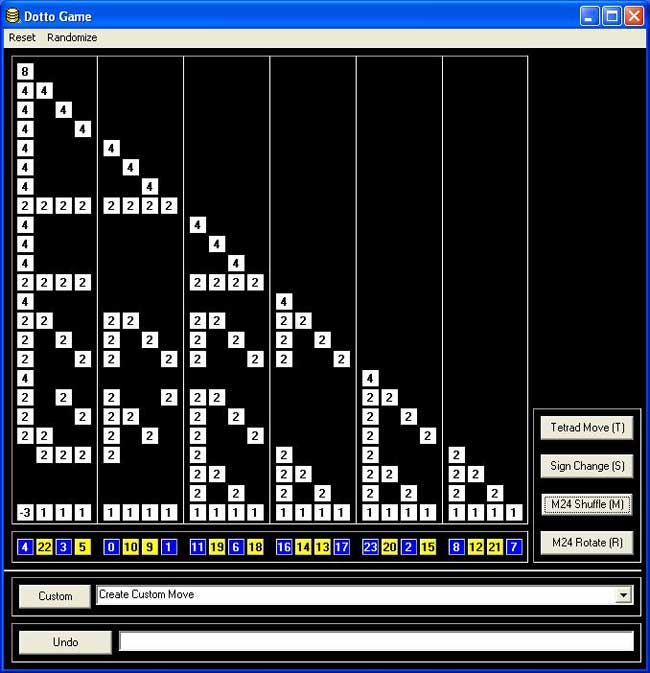
Their most original game is based on Conway’s $.0 $ (dotto) group. Unfortunately, they offer only a Windows-executable version, so I had to install Bootcamp and struggle a bit with taking screenshots on a MacBook to show you the game’s starting position :
Leave a CommentDotto:
Dotto, our final puzzle, represents the Conway group Co0, published in 1968 by mathematician John H. Conway of Princeton University. Co0 contains the sporadic simple group Co1 and has exactly twice as many members as Co1. Conway is too modest to name Co0 after himself, so he denotes the group “.0” (hence the pronunciation “dotto”).In Dotto, there are four moves. This puzzle includes the M24 puzzle. Look at the yellow/blue row in the bottom. This is, in fact, M24, but the numbers are arranged in a row instead of a circle. The R move is the “circle rotation to the right”: the column above the number 0 stays put, but the column above the number 1 moves to the column over the number 2 etc. up to the column over the number 23, which moves to the column over the number 1. You may also click on a column number and then on another column number in the bottom row, and the “circle rotation” moving the first column to the second occurs. The M move is the switch, in each group of 4 columns separated by vertical lines (called tetrads) the “yellow” columns switch and the “blue” columns switch. The sign change move (S) changes signs of the first 8 columns (first two tetrads). The tetrad move (T) is the most complicated: Subtract in each row from each tetrad 1/2 times the sum of the numbers in that tetrad. Then in addition to that, reverse the signs of the columns in the first tetrad.
Strategy hints: Notice that the sum of squares of the numbers in each row doesn’t change. (This sum of squares is 64 in the first row, 32 in every other row.) If you manage to get an “8”in the first row, you have almost reduced the game to M24 except those signs. To have the original position, signs of all numbers on the diagonal must be +. Hint on signs: if the only thing wrong are signs on the diagonal, and only 8 signs are wrong, those 8 columns can be moved to the first 8 columns by using only the M24 moves (M,R).
 Four years ago I had a brief fling with
  You may have surmised it from reading
  Btw. you can also use your favourite file-transport program (mine is